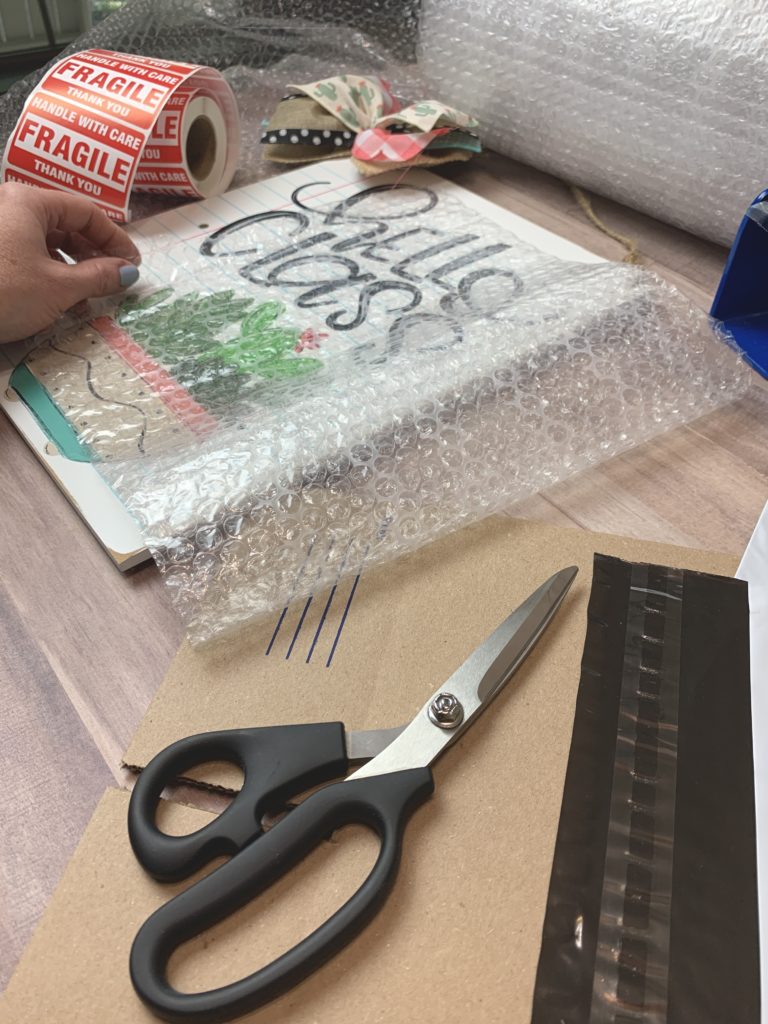
When you’ve worked hard, you want to make sure you take every step possible to make sure your wooden door hangers arrive safely to your customers! Whether you are just starting to sell your door hangers or you’ve been in business for a minute, these tips will help you save time and money.
This post contains affiliate links. As an Amazon Affiliate, I earn from qualifying purchases. I may receive a small commission – no extra cost to you – when you make a purchase through these links.

- Clear packing tape
- Moving boxes (or old Amazon boxes)
- Bubble wrap
- Scale
- Printer
- Shipping labels
You can purchase all these supplies on Amazon!
Here’s how we do it here at Canvas Sign Designs!
1. Wrap your sign in bubble wrap.
Place your door hanger on top of a sheet of bubble wrap big enough to cover your sign all the way around. Fold the bubble wrap over the front of the sign and tape up all the edges so that there are no open edges or loose ends. I recommend using clear packing tape.
2. Place your bubble-wrapped sign in a box.
I use moving boxes in size small from Walmart (they run roughly $0.70 per box), but you can also get free ones from your local post office. I also save old boxes from Amazon. DO NOT BUILD THE BOX! Cut the box in half so that you can open it and place your sign inside.
3. Cut the excess box (IE what does not fit around your sign).
Most signs will fit enough into the box where you can just cut the closing flaps. Make sure you leave enough of a border for added protection. If the wooden door hanger is too close to the edge, it is more likely to be damaged in the shipping process.
4. Fold the box all the way around the sign, just like the bubble wrap.
Tape to close, making sure you tape all the edges and any flaps so that nothing is exposed. How much you need to do this will depend on the size of the wooden door hanger and the type of box you use. Make sure the box is securely closed around the sign.
5. Place the sign, wrapped in bubble wrap and a box, into a mailer.
You can find these on Amazon, where you can bulk order based on size. These mailers add an extra level of protection, and while they may cost a bit more, they are much faster to use than Kraft paper (the brown paper you tape around the outside of boxes being shipped out), and they work much better. Plus, they are easier to letter on any personalization if you choose to do so!
6. Seal the opening and tape down, along with any loose edges.
Fold down the flaps to avoid catches and rips while shipping.
7. Place fragile stickers on both the front and back of the package.
This will alert people to handle your work with extra care.
8. Measure your package for shipping labels.
If you are paying for shipping at the post office, you can skip this step since they will handle it for you. However, if you are printing out a shipping label through Shopify or Etsy, then measure the length, width, and height, and weigh out your package as well.
9. Print out your label.
Place all the measurements into the system and print out the label. Tape carefully with clear packing tape.
10. Drop off your packaged wooden door hanger at the post office and wait for your customer’s satisfied smile!
Ahh, the feeling of another happy customer because of YOUR work. Nothing like it!
GET THE HELP YOU NEED TO MAKE YOUR OWN DOOR HANGERS!
If you want to have more DIY and crafting fun, or if you’re ready to get started selling your door hangers, join us at the Signmaker’s Society! My online membership site is open for registration only a few times a year. Get in on the waitlist for a monthly membership group of painting and lettering your own wooden door hangers! You’ll learn new techniques and get access to a ton of resources while having a blast right in your own home. Join the waitlist so you don’t miss your next opportunity to join!