")


This post contains affiliate links. As an affiliate, I earn from qualifying purchases. I may receive a small commission – no extra cost to you – when you make a purchase through these links.
Summer is here, and it’s time to get festive! In this tutorial, we’re making a 4th of July mini sign that’s perfect for adding some patriotic flair to your space! It features one of my hand-lettered designs from the Happy Lettering Club, and is a fantastic way to practice your skills.
This project is great whether you’re looking for a new hobby or want to make something unique for the upcoming holiday. Let’s dive into creating your own!
Supply List for Your DIY 4th of July Sign
Here’s what you’ll need to make this patriotic round sign:
- A small round sign blank (like an 8-inch wood round), which you can usually find at Dollar Tree or your local craft store
- White acrylic paint
- Pencil
- Small clips or painter’s tape to hold the template
- Graphite paper (make sure it’s good quality!)
- Paint pens or acrylic paint for lettering (red, blue, white, and black)
- Acrylic paint for splatter (red, blue, or colors of your choice)
- Paint brushes (including one for splatter paint)
- Sharpie creative marker or paint pen for outlining (optional)
- Holographic glitter
- Eraser (to clean up pencil lines)
- Red checkered ribbon (or a themed ribbon of your choice!)
- Hot glue gun and glue sticks (for attaching ribbon/embellishments)
➜ You can get most of these supplies in my Amazon storefront here!
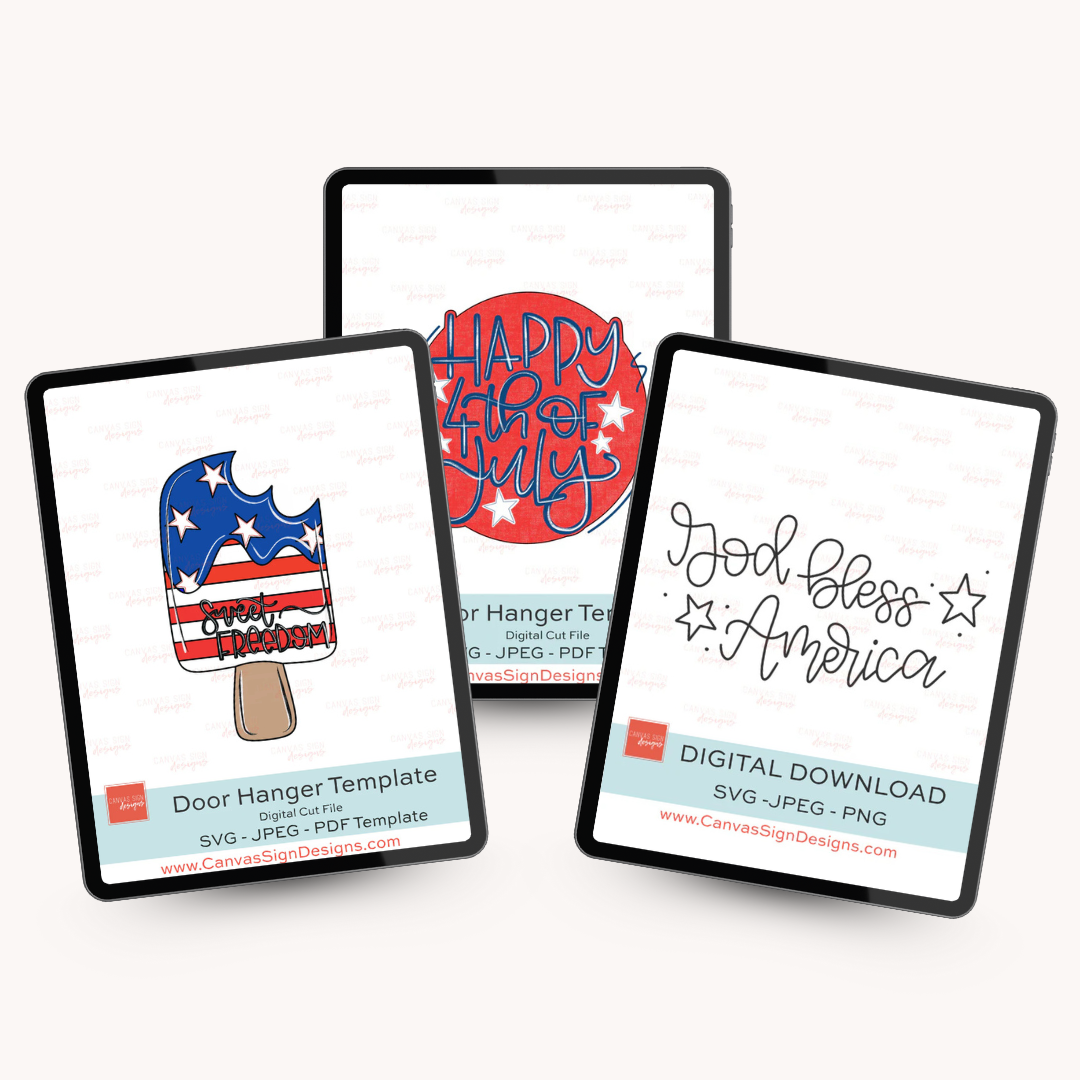
Where to Get the Hand Lettering Template
The template used for the lettering on this project is actually from the Template Library. If you want access to this design (and access to hundreds more), be sure to check it out here!
Step-by-Step Instructions
Let’s get creative! Follow these instructions to get started, or scroll up to see the video tutorial.
Step #1: Prep Your Round Sign
Start by giving your small round sign a coat of white paint. Applying white first gives you a nice, clean base for your lettering. A couple of thin coats usually do the trick for getting a nice, even coverage.
Let the paint dry completely before moving on to the next step.
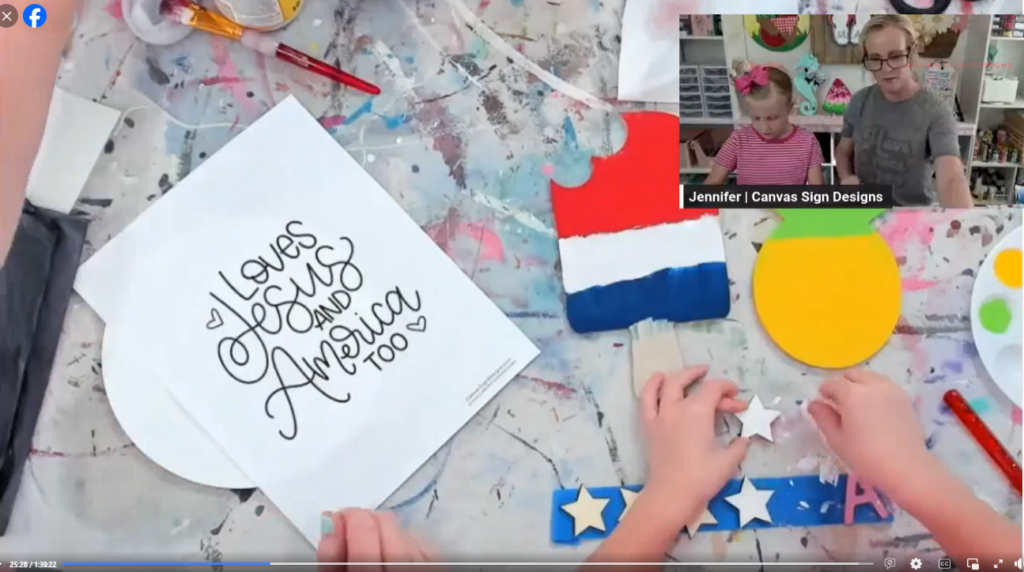
Step #2: Transfer Your Design Template
Once your white base is dry, position your printed template onto the sign. You can use small clips or a bit of painter’s tape to keep it from shifting. Place a piece of graphite paper (shiny side down!) between the template and the sign.
Now, using a pencil, carefully trace over the lines of the words and design on your template. Press firmly enough to transfer the graphite onto the painted surface, but be careful not to smudge it with your hand. Before unclipping, lift a corner to make sure the entire design transferred properly.
Step #3: Time for Hand Lettering!
This is where your design comes to life! Use your paint pens or acrylic paints to carefully fill in the transferred lines.
However, I will say that paint pens, like the Sharpie Creative Markers or Faber-Castell pens, are MUCH easier for lettering on signs.
Take your time going over what you traced with the template and graphic paper. Slow and steady wins the race! If you make a mistake, you can always touch it up.
Let the lettering dry completely before moving on to the next step.
PRO TIP: Some red paint pens can look a little too orange. Try testing them first to make sure they’re the right hue!
Step #4: Add Splatter Paint
Aside from the hand lettering, this is the most fun part!
Dilute your acrylic paint (the regular paint, not the paint pens) with a little water to make it runny. Dip a paintbrush into the watery paint and tap or flick it over the sign to create splatters.
Warning: It will be messy, but that’s the fun of it. And it definitely adds a more hand-painted look.
PRO TIP: Want to splatter paint before you hand-letter? It’s doable, just keep in mind that you’ll have to letter on a textured surface, which can be a bit difficult if you’re a beginner.
Step #5: Refine Your Design
Once the splatter paint is dry, you can go back and touch up any areas that you see need some tweaking. This will be especially helpful if you want to cover any parts of your lettering that may have been covered in splatter paint!
You can also add optional details like outlining the letters or the edge of the sign with a black or gray marker or paint pen. You can also add some glitter paint to make it shine!
Once everything is dry, attach your ribbon for hanging using hot glue, drilling holes, or another preferred method.
More 4th of July Craft Supplies
And there you have it — a handmade patriotic sign perfect for your 4th of July decor! I hope you had as much fun as I did making this, and remember…it’s not about being perfect. It’s just about being creative!
If you enjoyed this tutorial and want even more templates for the 4th of July, you can grab door hanger templates and lettering SVGs in the shop. They’re ready for instant download and can be used for mini signs, door hangers, and so much more!
Check it out here.